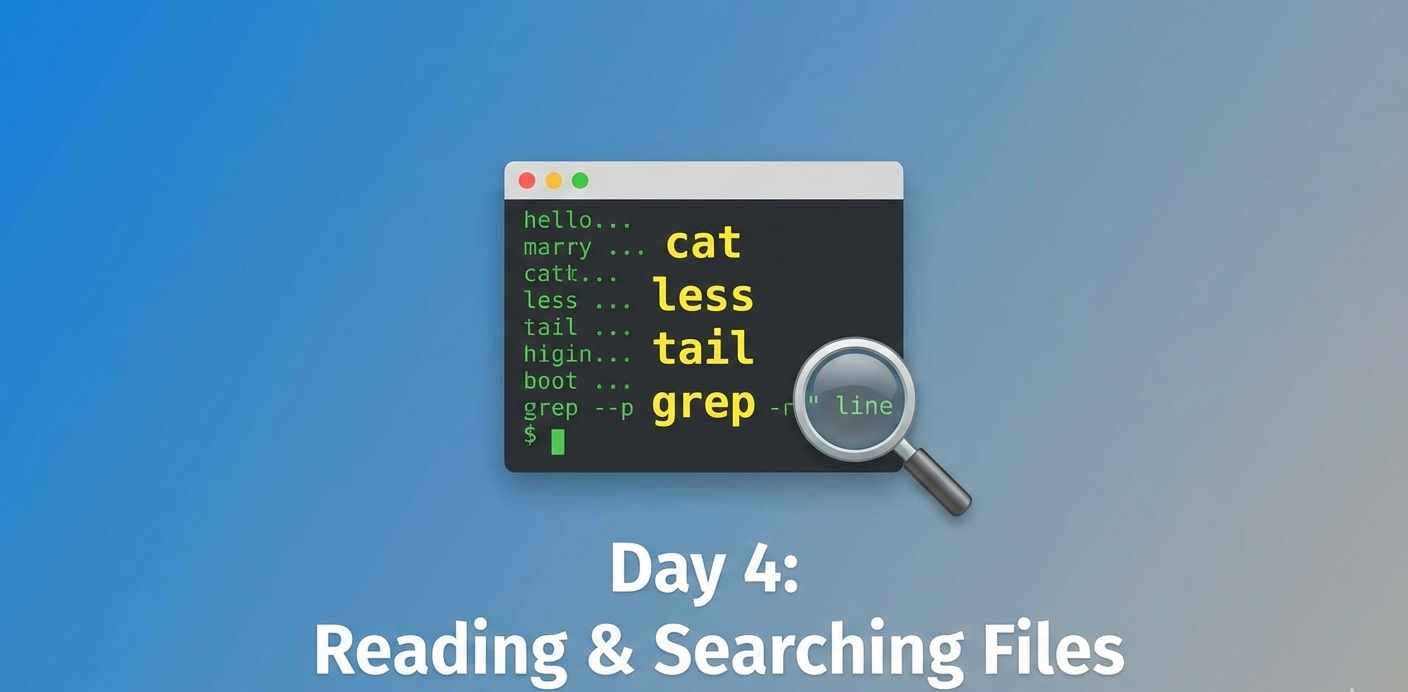
Day 4 - Reading and Searching Files: Inspecting Content and Finding Information
အားလုံးပဲ မင်္ဂလာပါ
Day -3မှာ ကျွန်တော်တို File manipulation အကြောင်းသင်ခဲ့ပြီးပြီဆိုတော့ နောက်ထပ် အရေးကြီးတဲ့ အပိုင်းဖြစ်တဲ့ ဒီဖိုင်တွေထဲမှာ ဘာတွေရေးထားလဲဆိုတာ သိဖိုပါပဲ။
DevOps သမားတွေအနေနဲ့ ကိုယ်က Server တစ်ခုရဲ့ Configuraion ကို အမြန် check လုပ်ဖို ဖို ဒါမှမဟုတ် error တစ်ခုခုဖြစ်တဲ့အခါ Log files တွေ ထဲမှာ ဘာဖြစ်သွားသလဲဆိုတာ ရှာဖတ်ဖို လိုပါတယ်။ ဒီနေ့မှာတော့ Text editor ဖွင့်စရာမလိုဘဲ Command Line ကနေ Files တွေကို မြန်မြန်ဆန်ဆန် ဖတ်နိုင်မယ့် နည်းတွေကို လေ့လာသွားပါမယ်။
1.📄 Quick Viewing for Small Files(cat)
File က သေးပြီး အထဲမှာ ဘာပါလဲဆိုတာ ချက်ချင်းသိချင်ရင် cat (concatenate) command က သုံးရတာ အဆင်ပြေဆုံးပါ။ cat က ဖိုင်ထဲမှာရှိတဲ့ content အားလုံးကို Terminal screen ပေါ်မှာ ချက်ချင်း ပြပေးပါတယ်။
ဥပမာအနေနဲ့ ကိုယ့် Server ရဲ့ Hostname ကို ကြည့်ကြည့်မယ်ဆို
1cat /etc/hostnameTerminal မှာ ကိုယ့်စက်ရဲ့ hostname ကို ချက်ချင်း မြင်ရမှာပါ။
ဒီမှာသိထားရမှာက cat က File အကြီးကြီး တွေကို ဖတ်ချင်တယ်ဆိုရင်တော့ မသင့်တော်ပါဘူး။ စာကြောင်းရေ ထောင်ချီရှိတဲ့ Log File ကို cat နဲ့ဖွင့်လိုက်ရင် screen ပေါ်မှာ စာတွေ အမြန်ရွေ့သွားပြီး ဘာမှ သေချာဖတ်လိုက်ရမှာ မဟုတ်ပါဘူး။
2.Reading Large Files Page-by-Page(less)
စာကြောင်းရေများတဲ့ ဖိုင်ကြီးတွေကို ဖတ်ဖိုအတွက်ဆို less command က အကောင်းဆုံးပါ။ less က ဖိုင်ကို တစ်ကြိမ်တည်းနဲ့ အကုန်မပြဘဲ ကိုယ်ဖတ်လိုရမယ့် အနေအထား page တစ်page စာကိုပဲ အရင်ပြပေးတယ်။ ပြီးမှ ကိုယ့်အနေနဲ့က ဆက် ရွေ့ပြီးဖတ်လိုရတယ်။
1less /var/log/syslog(System log ဖိုင်တစ်ခုကို စမ်းဖွင့်ကြည့်မယ်ဆိုရင်တော့ တချိုsystemတွေမှာ sudo လိုနိုင်ပါတယ်)
Navigating inside less
less ထဲရောက်သွားရင် ကျွန်တော်တိုသုံးနေတဲ့ Command prompt ပျောက်သွားပါလိမ့်မယ်။
အဲ့ခါ တစ်ကြောင်းချင်း အပေါ်/အောက် ရွေ့ချင်တယ်ဆို (Up/Down Arrows) နဲ့ သုံးလိုရတယ်
Spacebar သုံးရင်တော့ page တစ်ခုစာ အောက်သကိုရွေ့သွားမှာပါ
b key လေးနိုပ်မယ်ဆို page တစ်ခုစာ အပေါ်ကို ပြန်တက်သွားပါမှာ(back)
/ key ကျ ကိုယ်ရှာချင်တဲ့ text ကို ရှာလိုရတယ် ။(ဥပမာ: /error ရိုက်ပြီး Enter ခေါက်လိုက်ရင် "error" ပါတဲ့ နေရာတွေ ကို ရှာပေးမှာပါ)
q key ကို နိုပ်ရင်တော့ less ရဲ့ viewer modeထဲက ထွက်သွားမှာပါ(Quit)။
3. Monitoring Logs in Real-time(tail)
DevOps မှာ နောက်ထပ် အသုံးတဲ့ဝင် Command တစ်ခုကတော့ tail ပါ။ ပုံမှန်အားဖြင့် ကျွန်တော်တိုက Log ဖိုင်အဟောင်းတွေကို သိပ်စိတ်မဝင်စားပါဘူး။ လက်ရှိ ဘာဖြစ်နေလဲဆိုတဲ့ Latest entries ကိုပဲ သိချင်ကြတာပါ။
အဲ့ခါ tail command က ဖိုင်တစ်ခုရဲ့ နောက်ဆုံး စာကြောင်း ၁၀ ကြောင်း ကိုပြပေးတာ ဖြစ်လို့ သုံးဖို့ အဆင်ပြေပါတယ်။
1tail /var/log/syslogReal-time Log Monitoring (tail -f)
Server မှာ Error တက်နေတယ်၊ Application တစ်ခု run နေတုန်းမှာ Log တွေကို မျက်ခြေမပြတ် ကြည့်ချင်တယ်ဆိုရင် -f (follow) option ကို သုံးလိုရပါတယ်။
1tail -f /var/log/syslogဒီ Command က ဆုံးသွားမှာတော့ မဟုတ်ဘူး။ Log ဖိုင်ထဲကို စာကြောင်းအသစ် ဝင်လာတိုင်း Terminal မှာ အချိန်နဲ့တစ်ပြေးညီ ဆက်တိုက် ပြနေမှာ ဖြစ်ပါတယ်။ ရပ်ချင်ရင်တော့ Keyboard ကနေ Ctrl + C ကို နှိပ်ရမှာပါ။
4. Finding Text Inside Files(grep)
grep က ကိုယ်သတ်မှတ်လိုက်တဲ့ စာသား ပါတဲ့ စာကြောင်းတွေကိုပဲ ရွေးပြပေးမှာပါ။
Basic Syntax အနေနဲ့ grep "text-to-find" [filename]
ဥပမာ (Log ဖိုင်ထဲက "error" ဆိုတဲ့ စာလုံးပါတဲ့ စာကြောင်းကို ရှာမယ်ဆို
1grep "error" /var/log/sysloguppercase ,lowercase မခွဲဘဲ ရှာချင်ရင် -i (ignore case) ကို သုံးလိုရတယ်။
1grep -i "error" /var/log/syslogဒါဆိုရင် "Error", "ERROR", "error" အားလုံးကို ရှာပေးမှာပါ။
Learning Exercise
အ့ဆိုဒီနေ့ လေ့လာခဲ့တာတွေကို စမ်းကြည့်ရအောင်။
ကိုယ့်စက်ရဲ့ CPU info ကို cat /proc/cpuinfo နဲ့ ကြည့်ကြည့်လိုက်ပါ။ စာတွေ အများကြီး ထွက်လာမှာပါ။
အဲဒီဖိုင်ကိုပဲ less /proc/cpuinfo နဲ့ ပြန်ဖွင့်ကြည့်ပါ။ arrow keysေတွ၊ Spacebar တွေသုံးပြီး ဖတ်ကြည့်ပါ။ ပြီးရင် q နဲ့ ပြန်ထွက်ပါ။
ကိုယ့်စက်ထဲမှာရှိတဲ့ Userတွေကို ရှာကြည့်မယ်။ /etc/passwd ဖိုင်ထဲမှာ ကိုယ့် username ပါတဲ့ စာကြောင်းကို grep နဲ့ ရှာပါ။
1grep "your_username" /etc/passwdဒီနေ့တော့ ဒီလောက်ပါပဲ။
နောက်ရက် Day 5မှာတော့: ကျွန်တော်တို Linux Fundamentals (Phase 1) ရဲ့ နောက်ဆုံးအပိုင်းအနေနဲ့၊ Text Editor တစ်ခုဖြစ်တဲ့ Nano ကို အသုံးပြုပြီး ဖိုင်တွေကို ဘယ်လို edit and change လုပ်မလဲဆိုတာ ဆက်လေ့လာသွားပါမယ်။
Discussion
Join the conversation
How do you feel about this article?
Comments
Sign in to join the conversation
Sign in to be the first to comment!
Share Your Article
Share with your professional network
Recent Articles

AWS - Application Load Balancer
Elastic Load Balancing (ELB) ELB ဆိုတာကတော့ request တွေကို တစ်နေရာတည်းမှ လက်ခံကာ Amazon EC2 instances၊ containers, etc.....
Terraform Day 3: Benefits of Terraform State
Terraform ကိုလေ့လာ တဲ့အခါ ကျွန််တော်တို့ရဲ့ Project Folder ထဲမှာ terraform.tfstate ဆိုတဲ့ ဖိုင်လေးကို တွေ့ဖူးကြပါလိမ့်မယ...
Terraform Day 2: Essential IaC Principles You Must Know
မနေ့ကတော့ Terraform အကြောင်း အကြမ်းဖျင်း Concept ကို ပြောပြခဲ့ပြီးပြီဆိုတော့ ဒီနေ့မှာတော့ Terraform ကို Professional ကျက...
TCP/IP Protocol
အားလုံးပဲမင်္ဂလာပါ။ ဒီနေ့ ကျွန်တော်တို့ TCP/IP Protocol အကြောင်း ဆွေးနွေးသွားပါမယ်။ ပထမဆုံးအနေနဲ့ TCP/IP ရဲ့ History လေး...
Terraform Day 1: Introduction to IAC and Terraform
ကျွန်တော်တို့ cloud အကြောင်း စပြောကြပြီဆိုရင် အရင်ဆုံး ခေါင်းထဲရောက်လာတာ Console ထဲဝင်၊ UI ကနေ ခလုတ်လေးတွေ လိုက်နှိပ်ပြီ...